We decided to make our own mounting brackets for the PV panels. This was mostly due to cost as the standard mounting kits can be very expensive.
With a Solar PV installation the payback time is enormous so anything that inflates the installation cost is undesirable.
We took our inspiration from the Solar Hot Water (SHW) panel we installed. This mounts on straps that screw into the roof timbers and hang between the gaps in the tiles.
The components we used are as follows:
- Thin Metal strips
- Flamco mounting rail
- Flamco joining strips
- Stainless Steel Nuts, Bolts and Washers
The thin metal strips we brought from B&Q for about £7 each, the Flamco rail was from BTS again at about £7 each. Flamco joining strips were a few quid from BTS and we sourced the Stainless Steel Nets, Bolts and Washers from eBay and the odd extra from Camp du Roi.
First we needed to lift a few tiles and screw in one of the thin metal strips.
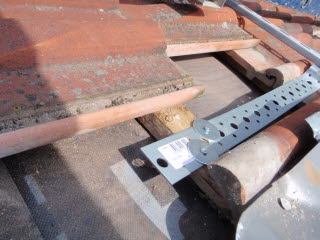
Ideally we would have screwed the metal strips into a joist but this would have meant penetrating the roofing felt and possible damaging the loft room ceiling underneath. so we decided to get a good fixing into a baton.
We had to put a kink in the metal strips to bring the end up to the level of the ridges on the tiles to make fixing the horizontal Flamco rail into without it lifting the bottom of the tiles.

Once we had the top rail installed on the roof we measured, measured and remeasured again to work out where the bottom rail needed to be and we repeated the process for the bottom rail.
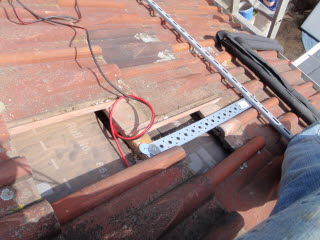
With the way the bottom rail hung we did not need to kink the metal strip. If we were hanging the panels on a slate roof then we would have not needed a kink at all.
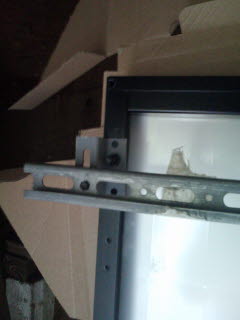
Because the mounting holes in the panels are underneath the panels we had to use a step bracket to mount the panel to the Flamco rails.
This picture shows the back of the panel with the step bracket attached. The Step bracket is then bolted to the Flamco which will be hung from the roof.
The panels were then lifted (very carefully) up onto the roof and were bolted down individually to the rails
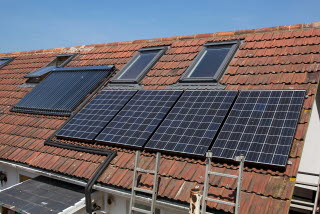
In this picture you can see the three mounted panels and the rails where the 4th panel is about to go.
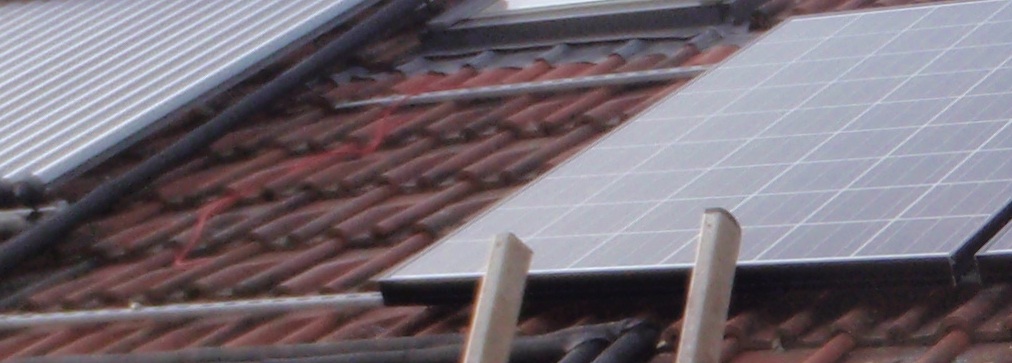
Finally we had all four panels installed.

Thanks to Richard Lord for taking the final two images.